Step 1 – Background Preparation
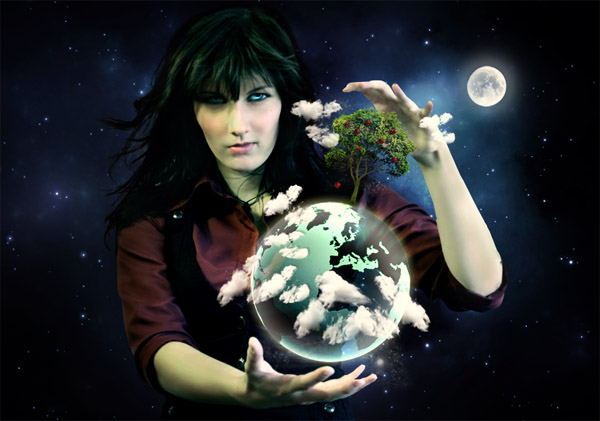
Open the photo with the
girl. Right-click on the “background” layer and select Layer From The Background, which unlocks the layer. Name the layer “GIRL.”
Now open the picture of the
background
and drag it into the picture with the girl and name it “BACKGROUND.” As
you can see the background is smaller than the photo of the girl. To
make it bigger click on the layer “BACKGROUND,” preset Command + T, and
while holding Shift make it bigger. If you hold Shift, proportions of
the picture stay the same.
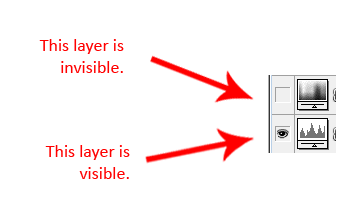
Place the “BACKGROUND” under the “GIRL” and make the “GIRL” layer
invisible. Before blending these two images together we will work on the
background a little bit.
If you look at the “BACKGROUND,” you can see that the quality of the
image is quite bad because of resizing. Go to Filter > Blur >
Gaussian Blur and set the Radius to about 1px. It will be a little
blurry, but it really doesn’t matter. Press OK.
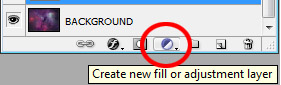
Now make the background darker – add Adjustment Layer Levels. The
button Create New Fill or Adjustment Layer can be found on the bottom
part of the Layers palette. If you don’t see the Layers palette, then
press F7 and it appears. In the dialogue window Levels set the Input
Levels on 34; 0,82; 255 and press OK.
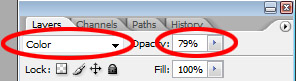
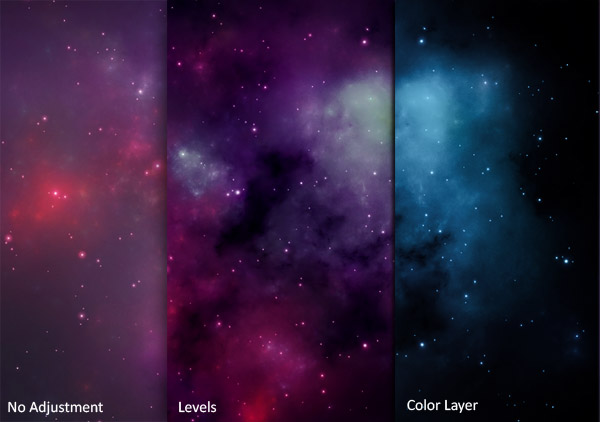
As you can see in the preview image the background isn’t reddish but
blue. To change your background add a new layer above the “BACKGROUND”
layer and adjustment layer Levels and name it “BLUE TONES.” Grab the
Gradient Tool (G), pick this color #1f79a3 and fill the layer with it.
Now change the Blending Mode of the layer to Color and set the Opacity
to 80%.
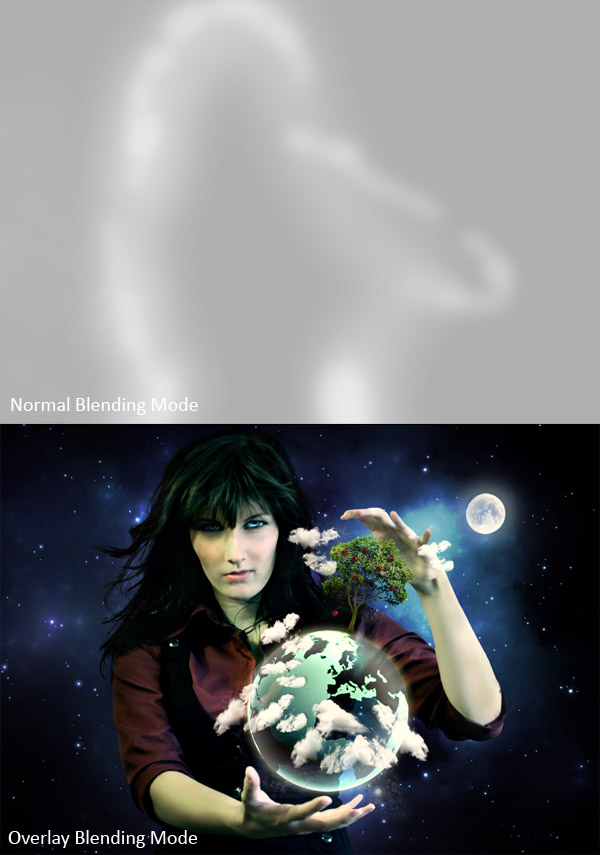
Step 2 – Blending he Hair
Blending flying hair is always difficult because there is no easy or
quick way to do it. But in case that you have a stock photo with a light
background and want to blend it with a dark background, there is one
trick you can do really quickly only by changing blending modes.
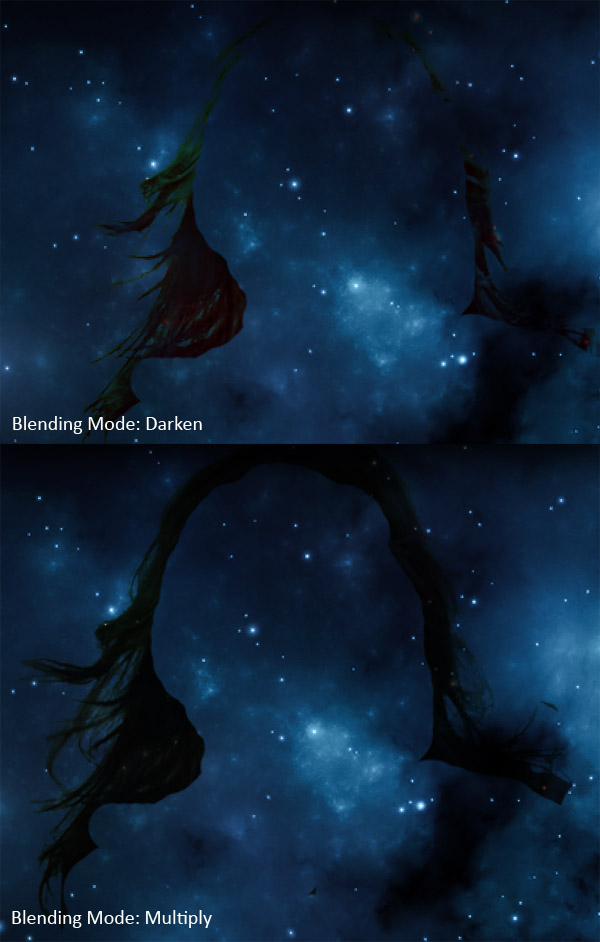
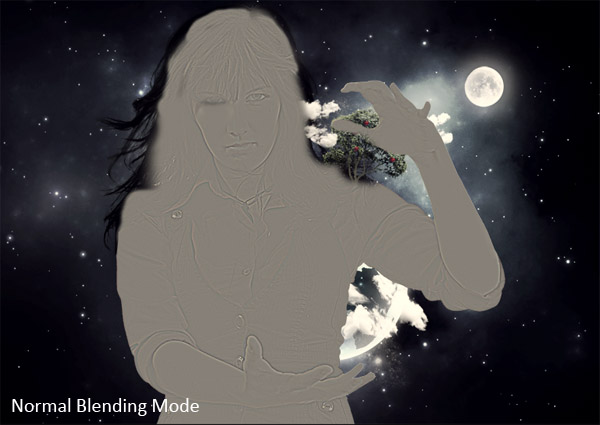
Duplicate the “GIRL” layer, name it “FLYING HAIR” and place it under
the “GIRL” (which should still stay invisible). Now change the Blending
Mode to Multiply (you can also use Blending Mode Darken if Multiply
looks too dark). Add a vector mask to this layer and with a black brush
paint over all the parts of the layer except the hair to make them
invisible.
Step 3 – Cut Out the Background of The Girl
Make the “GIRL” layer visible. You need to cut out the background of
the layer. There is many ways how you can do it. Use the technique that
you’re most comfortable with. But remember to cut everything very
carefully. I know it can be boring to do it, but if you make it sloppily
the result will never look realistic. You don’t have to care about the
hair much because we’ve prepared that in the previous step.
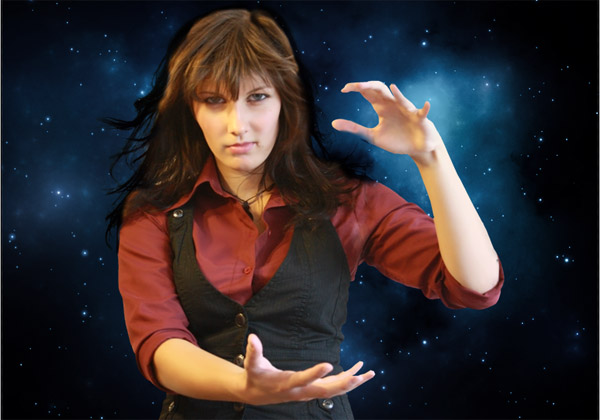
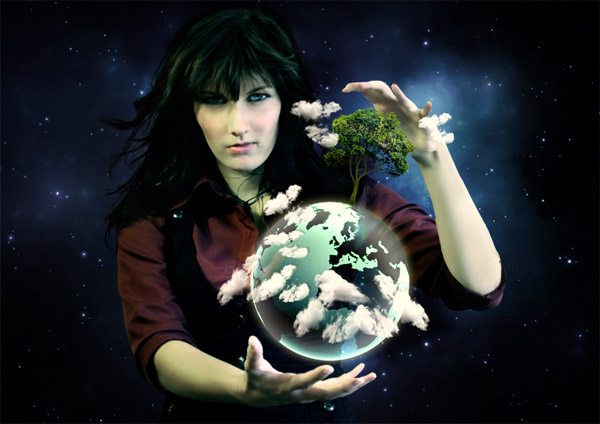
After cutting out your picture it should look like the image below.
Step 4 – Retouching The Girl
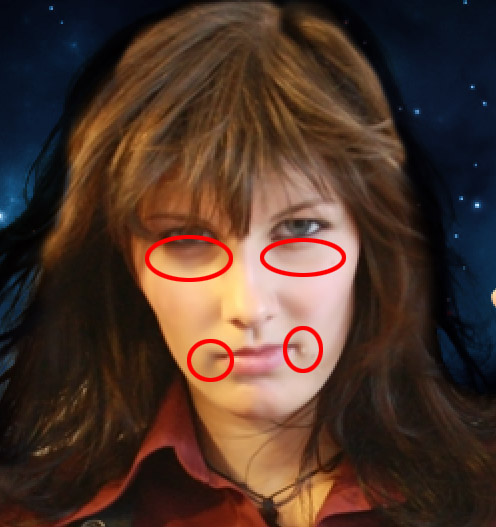
The girl has ugly shadows under her eyes, cheeks and nose, from the
lighting cast during the shooting of this photo. In this step we’ll
remove these shadows. Add a new layer above the “GIRL” and name it
“RETOUCH.” Right-click on the layer and select Create Clipping Mask.
Now grab the Stamp Tool (S), select a soft, round brush and set the
Opacity on 20%. Press Alt and click on a lighter area of her face to set
the place from where the skin will be duplicated. Then paint over the
areas with shadows (areas which are circled in the picture below).
Change the source of the cloning from time to time to get a more natural
result.
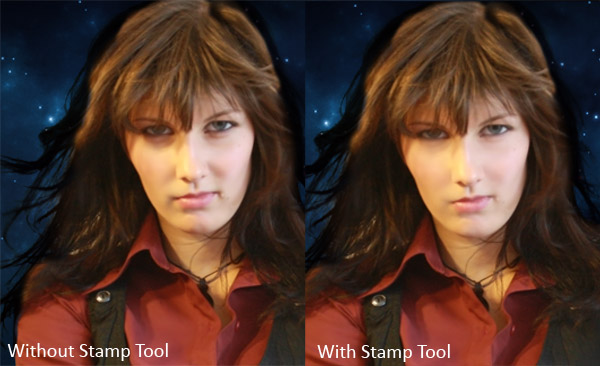
In the picture below you can see how the face looks before and after using the Stamp Tool.
http://d2f8dzk2mhcqts.cloudfront.net/351_Transform_Planet/09.jpg
Step 5 – Color Adjustment of The Girl
It’s obvious that the girl doesn’t fit the background. We’ll fix that during this step by using several adjustment layers.
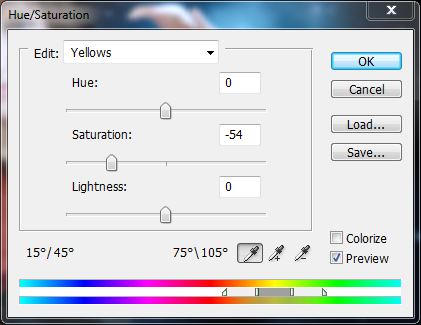
At first we will remove the yellow light from the light bulb. Add a
new Adjustment Layer Hue/Saturation and make a clipping mask from it.
Set Edit on Yellows and lower the Saturation to -54.
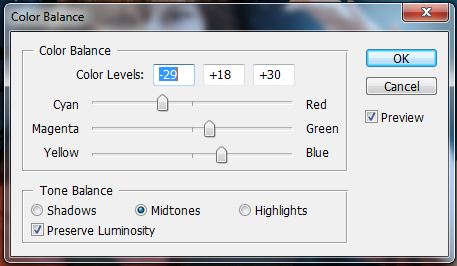
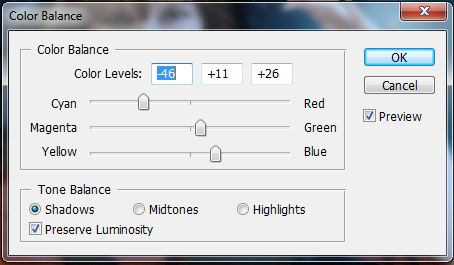
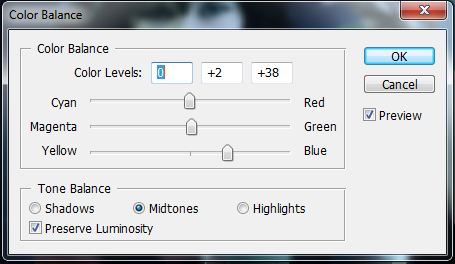
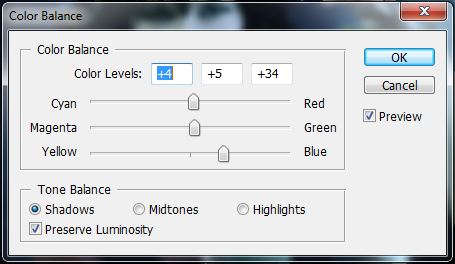
Now we’ll make the girl bluer. Add a Color Balance Adjustment Layer,
make a clipping mask from it and set it as you see in the pictures
below.
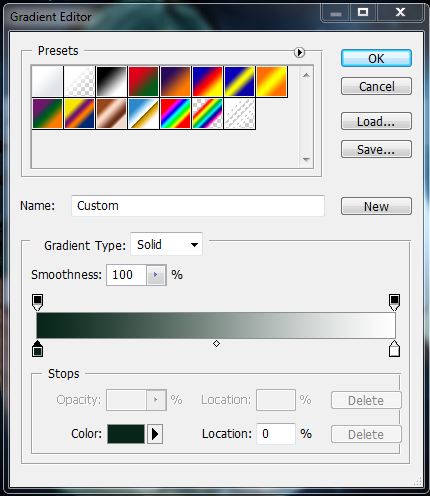
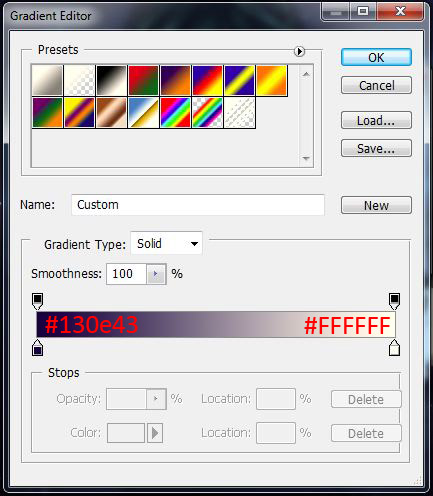
To make it even bluer add a Gradient Map Adjustment Layer. Don’t
forget to create a clipping mask from it. For dark tones select a dark
blue color (I used #072519) and for light tones use white. Press OK and
lower the Opacity to 30%.
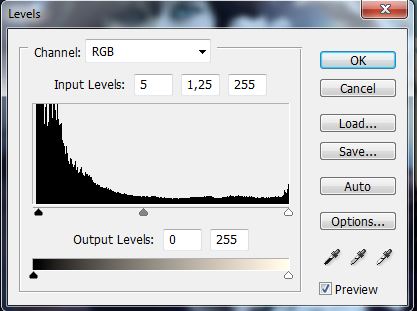
And one last thing for now – we will increase contrast. Add a Levels
Adjustment Layer, create a clipping mask from it and set the Input
Levels to: 33, 0,73, and 238. Press OK.
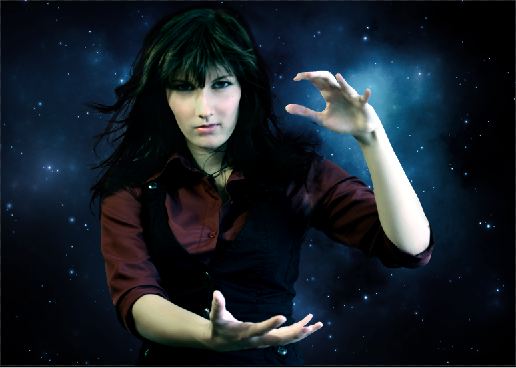
After this step your picture should look like this:
Step 6 – Brighten Eyes
This is just a quick step, let’s brighten the eyes. Add a new layer
above the “GIRL” and all clipping masks and name it “BRIGHTEN EYES”.
Grab the Gradient Tool (G), pick #808080 as the color and fill the
layer. Then change the Blending Mode to Overlay. Select a soft, round
brush at a size that is similar to the size of the irises, pick a white
color and paint over the irises. It makes them brighter.
Step 7 – Adding The Planet
Open the picture of
earth
and drag it into the manipulation. Name the layer “PLANET.” As you can
see the planet is too big. To make it smaller press Command + T and
resize it. Hold Shift to constrain proportions while resizing. Cut out
the background of the planet.
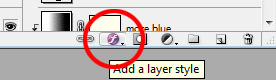
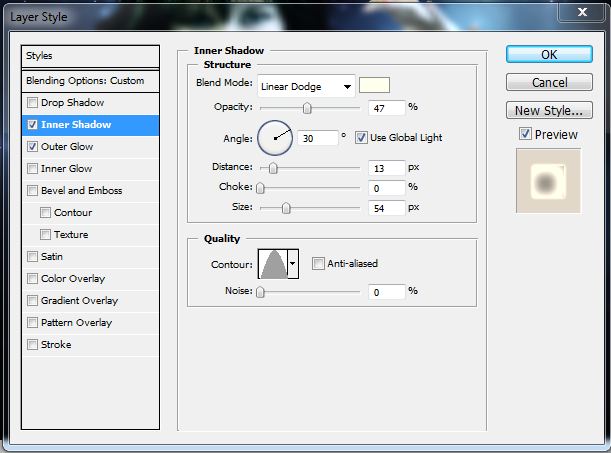
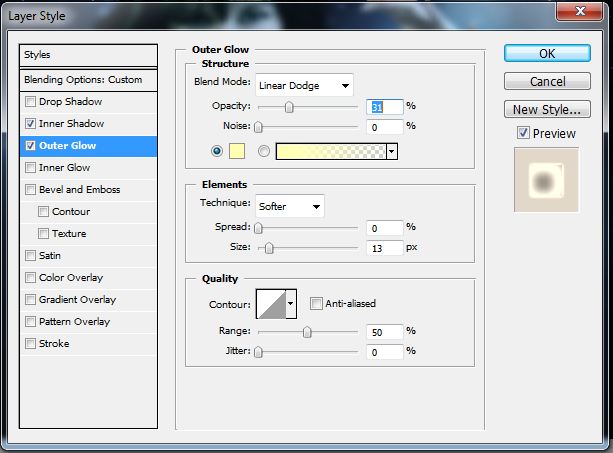
Let’s add two layer styles: Inner Shadow and Outer Glow. The Add
Layer Style button is located at the bottom part of the Layers palette.
Set the layers styles as you can see below:
Add an Adjustment layer of Hue/Saturation above the layer “PLANET”
and set the value of the Hue to +90 and Saturation to -20. Press OK and
make a Clipping Mask from this layer.
Change the Blending Mode of the “PLANET” to Hard Light. It makes it semi-transparent.
Step 8 – Adding The Tree
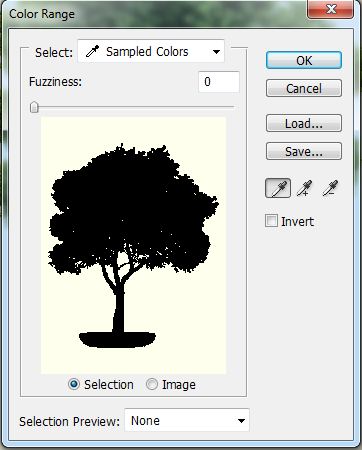
In this step we will add the tree. Open the picture of it. Go to
Select > Color Range. Then click on the white background which will
select it.
Press Command + Shift + I. It makes inverse selection. Drag this
selection into the photo manipulation above the “PLANET.” Name the layer
“TREE.” Press Command + T and resize the tree on the proper size. Don’t
forget to hold Shift during the process so proportions stay the same.
As you probably see the selection should be better. It’s again not
hard to fix it. Command click on the thumbnail of the tree. It activates
the mask of the layer. Now go to Select > Modify > Contract and
set it to 2 px. Press OK. Now press Command + Shift + I (inverts the
mask) and then Delete which will remove the unwanted parts.
Add a Levels adjustment layer above the “TREE” layer and set the
Input Levels on 21; 1,12; 232. Press OK and create a clipping mask from
this layer. Then add a Color Balance adjustment layer and set it as you
can see below.
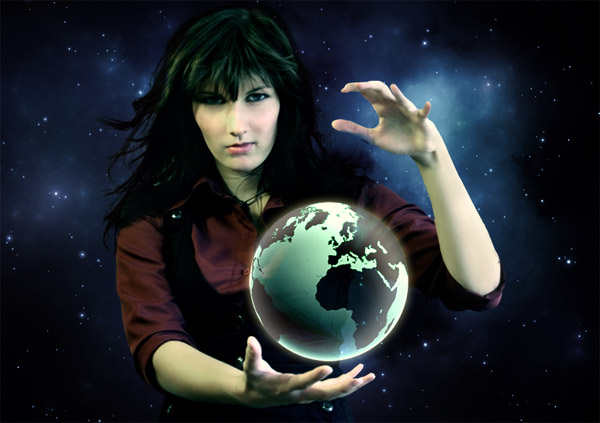
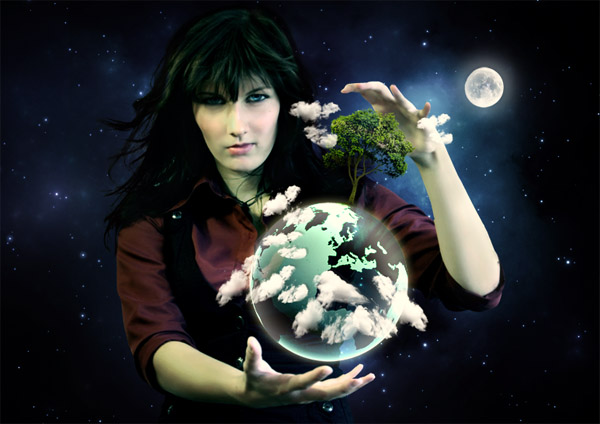
After this step your photo manipulation should be similar to this one:
Step 9 – Changing the Global Light
In this step we will make the place around the planet brighter to
catch the viewer’s attention on this place. Add a new layer under the
“PLANET” and name it “GLOBAL LIGHT.” Grab the Gradient Tool (G) pick
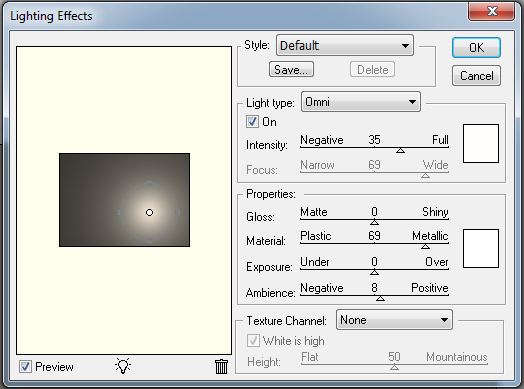
#808080 color and fill the layer. Now go to Filter > Render >
Lighting Effects and set the dialogue window as shown.
Notice that I place the brightest spot from the center to the place
where the planet is. Now change the Blending Mode to Overlay. It changes
the light of the manipulation.
I also used this layer to make the eyes even brighter. Grab the Brush
Tool (B), select a soft, round brush with a Diameter similar to the
size of the pupils, pick white for the color and paint on this layer
over the girl’s pupils. It makes them brighter as shown.
Step 10 – Adding Clouds
In this step we will add clouds. Install the
clouds brush you downloaded. If you don’t know how to do that look at
this tutorial.
Add a new layer on the top of the layers and name it “CLOUDS.” Pick
white for the color and paint some clouds around the planets. You can
paint them around the tree and girl’s hand as well. It’s completely up
to you and your taste.
Once you’re finished duplicate “CLOUDS” and change the Blending mode
of this layer to Screen. This step makes the clouds nicely white, not
grey.
One more thing which must be done is adding shadows. It’s really
easy. Duplicate the “CLOUDS” once again and place this layer under the
“CLOUDS.” Command-click on the thumbnail of this new layer. It activates
the mask of the layer. Grab the Gradient Tool (G), pick a black color
and fill the selection. Now move the layer a little bit to the right and
lower the Opacity to 25%, which gives it a more realistic result.
Step 11 – Adding the Moon
Open the picture of the
moon,
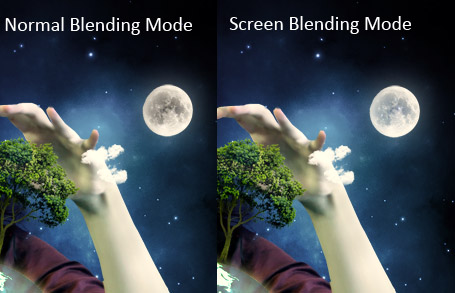
cut out the background, and drag it into your manipulation. Place the
layer on the top of your other layers and name it “MOON.” Change the
Blending Mode to Screen.
Now we’ll add an aura around the moon. Add a new layer under the
“MOON” and name it “AURA AROUND THE MOON.” Grab the Brush Tool (B),
select a soft, round brush and pick a bright blue color. Lower the
Opacity of the brush to about 15% and paint around the moon to make a
nice aura.
Step 12 – Adding Apples
Open the picture of the
apples.
Select the apple in the front and drag it into the photo manipulation.
Press Command + T, and while holding Shift make it smaller. Duplicate
the apple several times and place it in different places of the tree.
You can flip them and rotate them to get more variety.
Once you’re finished merge all layers with the apples into one and
name it “APPLES.” Now we have to blend them and add the shadow
underneath. To blend them add a vector mask (the button Add Vector Mask
is located at the bottom of the Layers palette in the same place as the
Add Layer Style button, which we used a few steps back) to the layer.
Now with a black brush, paint over some areas to make them disappear.
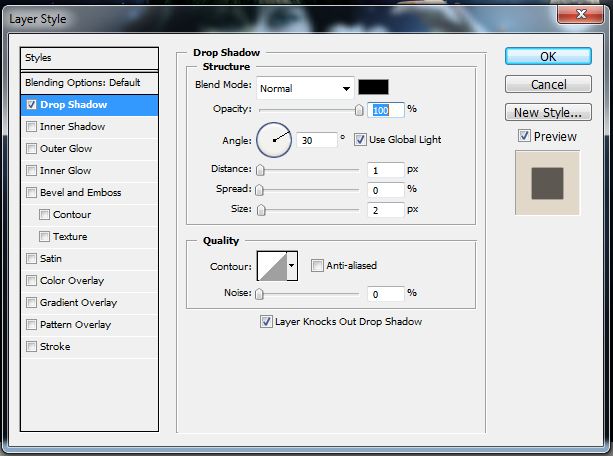
Now add a Drop Shadow Layer style. Set it as shown below.
After this step your picture should by similar to this:
Step 13 – Changing Lights And Shadows
Now we will change the lights and shadows so they fit better to the scene.
Add a new layer on top of all the layer and name it “LIGHTS &
SHADOWS.” Grab the Gradient Tool (G), pick #808080 color and fill the
layer with it. Change the Blending Mode to Overlay. Now grab the Brush
Tool (B), pick white for the color and paint over the areas you think
should be lighter. Use a lower opacity to make the light not so strong
and a higher opacity to make it stronger. Lighten the pupils of the girl
once again.
Now pick a black color and paint over the area where shadows should
be. Play with the opacity again to get more realistic results.
Step 14 – Adding Glitter
Install the glitter brush you’ve downloaded before. Add a new layer
on top of your layers. Name it “GLITTERS” and paint with the brush
around the girl’s hand a little.
Step 15 – Adding Aura Around The Girl
To separate the girl from the background a little we will add aura
around her. Add a new layer under the “GIRL” and name it “AURA AROUND
THE GIRL.” Grab the Gradient Tool (G), pick #808080 color and fill the
background. Change the Blending Mode to Overlay. Now grab the Brush Tool
(B), select a soft, round brush, pick white for the color and paint
around the girl. You can see what I mean below.
Step 16 – Global Adjustment
We’ve already placed all elements so now we have to adjust the
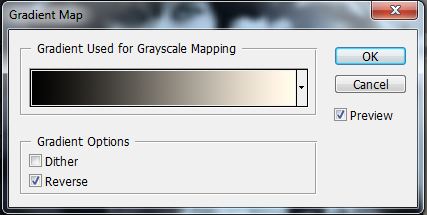
picture. At first add a new Gradient Map Adjustment Layer on the top of
your layers and set it as you see below.
Now add a Levels Adjustment Layer and set it like this:
Decrease the saturation of the picture. You can use an Adjustment
Layer of Hue/Saturation or (like me) use the Gradient Tool. Set the
Opacity of this layer to 60%.
After this step your picture should look like this one:
Step 17 – Increasing The Saturation of the Eyes
As you can see in the preview picture, the eyes are more saturated than the rest of the picture. We’ll make it in this step.
At first click on the vector mask of the adjustment layer with
gradient and lower the opacity. Grab the Brush Tool (B), pick a black
color and choose the same size of brush as the pupils are. Now paint
over them. This step will remove the desaturation effect on the eyes.
Now add a new Hue/Saturation Adjustment Layer and set the value of
Saturation to +100. Grab the Gradient Tool (G), pick a black color and
fill the vector mask of this adjustment layer. Then grab the Brush Tool
(B), pick white for the color and paint over the pupils. It makes them
even more saturated.
Step 18 – Sharpening
Grab the Marquee Tool (M) and select the whole manipulation. Now go
to Edit > Copy Merged and then press Command + V to paste the merged
image. Place the layer on the top of all the layers.
Go to Filter > Other > High Pass… and set the value Radius on
about 5 px. Change the Blending mode of the layer to Overlay.
The whole picture is sharper. But according to me the sharp
background doesn’t look nice and it should be without the High Pass
effect. Grab the Eraser Tool (E) and erase this layer on the places
where the background is, as shown below.
Step 19 – Changing Lights And Shadows Once More
This is the last time we change the lights and shadows. Paste the
merged picture once again on top of all layers. Now press Shift +
Command + U to desaturate the image and Command + I to invert colors.
Go to Filter > Blur > Gaussian Blur and set the value radius on
about 15 px. Press OK. Change the Blending Mode of this layer to Overlay
and lower the Opacity to 30%.
Step 20 – Final Touch
You are almost done. There are two easy things to fix. At first I
think that the image should be little bit darker. To fix that add a new
Levels Adjustment Layer and set the Input Values on 0; 1,1;255. Press
OK.
Now add a Color Balance Adjustment Layer and set the Color Levels on -6; 0; +4 and press OK. That’s all.
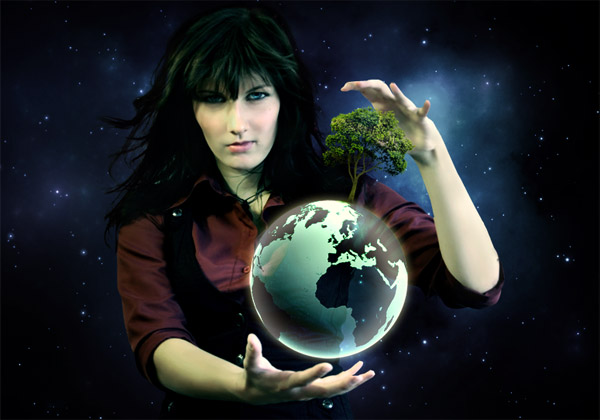
Conclusion
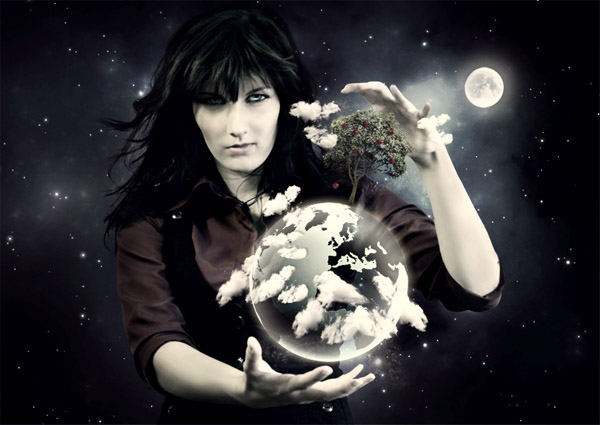
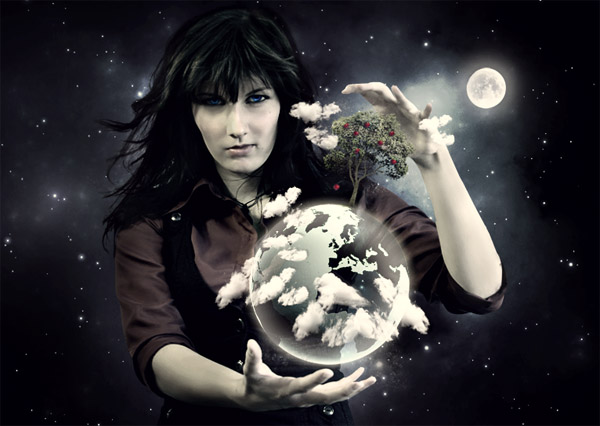
Congratulation! You’ve just finished this photo manipulation. Hope
that you’ve learned something new in this tutorial or found inspiration
for your next photo manipulation. Have a great day and thanks for
reading!


 2.
Pindah tool Anda menjadi pick tool, ubah posisi lingkaran menjadi
seperti gambar diatas. Jika ukuran ellips kurang besar/kecil anda bisa
klik dan drag kotak-kotak hitam yang mengelilingi lingkaran. POsisikan
seperti gambar diatas. Sambil menekan tombol keyboard Shift klik sekali
pada teks
2.
Pindah tool Anda menjadi pick tool, ubah posisi lingkaran menjadi
seperti gambar diatas. Jika ukuran ellips kurang besar/kecil anda bisa
klik dan drag kotak-kotak hitam yang mengelilingi lingkaran. POsisikan
seperti gambar diatas. Sambil menekan tombol keyboard Shift klik sekali
pada teks  3. Ubah